Why AR Porn Requires Proper Setup
Traditional VR porn works anywhere — cramped closets, bright offices, cluttered bedrooms. AR fundamentally differs: it overlays performers into your actual environment using passthrough cameras. Your room’s lighting, layout, and organization directly affect viewing quality.
Poor lighting makes passthrough grainy and performers appear obviously composited. Cluttered spaces create visual chaos. Insufficient clearance prevents movement around performers — defeating AR’s core advantage. This 10-15 minute preparation transforms AR from “interesting tech demo” into genuinely immersive experiences traditional VR cannot replicate.
Step 1: Choosing Your Device
Hardware Requirements Explained
Not all VR headsets support AR porn effectively. The technology requires color passthrough cameras, sufficient processing power for real-time environmental compositing, and tracking precision for stable virtual object placement. Three devices currently meet these requirements:
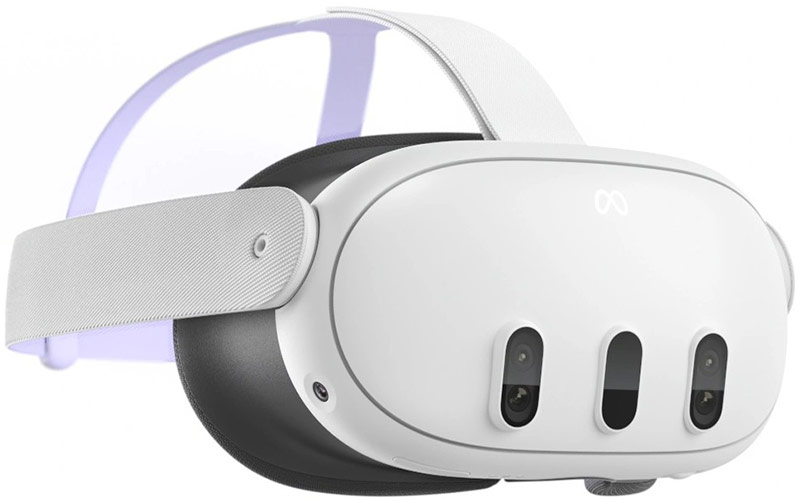
Meta Quest 3 (Recommended) – The mainstream AR porn solution. Four outward-facing color cameras capture 18 pixels per degree at 90Hz refresh. The XR2 Gen 2 processor handles passthrough processing, spatial mapping, and video rendering simultaneously without thermal throttling. Quest 3’s $499 price point ($649 for 512GB) makes it the most accessible AR-capable device. Platform compatibility is universal — every AR porn site optimizes primarily for Quest 3.
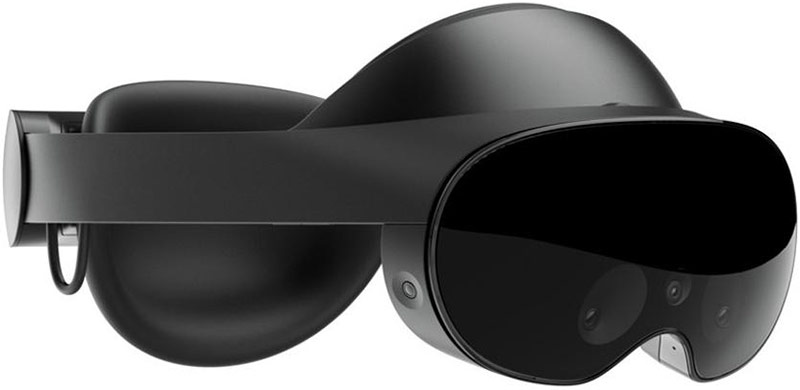
Meta Quest Pro – Premium option with superior passthrough quality (higher resolution cameras, better low-light performance) but aging processor limits advantages over Quest 3. The $999 price proves difficult to justify when Quest 3 delivers 95% of the experience at half the cost. Choose Quest Pro only if you already own it or need its business-focused features beyond AR porn.
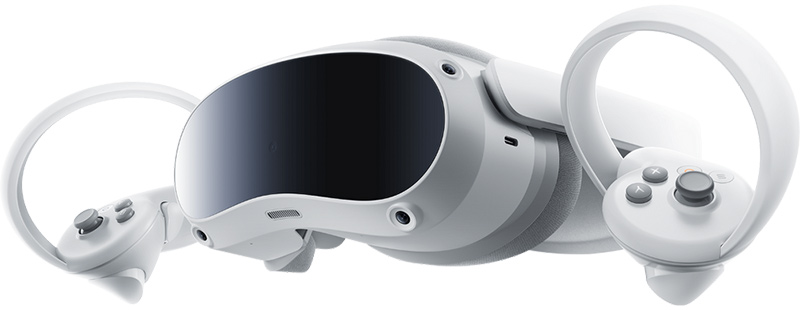
Pico 4 – International alternative popular in Europe and Asia. Comparable specifications to Quest 3 with regional pricing advantages in some markets. However, AR porn platforms optimize for Meta’s ecosystem first, occasionally causing performance inconsistencies on Pico hardware. Choose Pico 4 if Quest 3 is unavailable in your region or you prefer avoiding Meta’s ecosystem.
Apple Vision Pro – Technically capable with exceptional passthrough quality and computational power. However, most AR porn platforms use WebXR standards tailored for Meta devices. Vision Pro compatibility remains limited as of 2025, with dedicated content scarce. The $3,499 price makes it impossible to recommend solely for AR porn unless you’re already purchasing for other spatial computing purposes.
Step 2: Setting Up the Play Area
Space Requirements: Minimum 2×2 meters functional, 3×3 meters optimal. You need clear walkable paths — furniture can remain but avoid clutter requiring navigation while wearing a headset.
Keep: Large stationary furniture (beds, couches, desks). Positioning performers on your actual couch creates stronger presence than floating them in empty space.
Remove: Small items creating visual clutter, shin/knee-height tripping hazards, breakable objects within arm’s reach plus 50cm safety margin.
Guardian Boundaries: During setup, Quest 3 prompts you to draw boundaries by walking the perimeter. Set boundaries 30-50cm inside actual walls to prevent wall punches during hand gestures.
⚡ Quick Tip: Test boundaries before viewing AR content. Walk deliberately toward each boundary and verify warnings appear with adequate advance notice. Adjust if warnings trigger too late or too early.
Step 3: Lighting and Safety Tips
Optimal Lighting: 300-500 Lux
Passthrough camera quality depends directly on lighting. Too dark produces grainy feeds. Too bright washes out virtual performers. Target 300-500 lux — equivalent to well-lit living room.
I tested different lighting levels extensively. At 250 lux, Quest 3 showed moderate grain that detracted from presence. At 350 lux, grain reduced to acceptable levels. At 450 lux, passthrough looked clean and performers integrated naturally. Below 300 lux, even Quest Pro exhibited unacceptable grain.
Light Sources: Overhead LED panels (4000-5500K color temperature) provide consistent, controllable illumination. Natural window light works but creates inconsistency — 3 PM looks different than 7 PM as sunlight angle changes. Avoid mixing natural and artificial sources; cameras see different color temperatures than your brain perceives.
Testing Insights: What Actually Matters
- Lighting consistency beats intensity: 350 lux artificial light outperformed 450 lux mixed lighting
- Tracking improved after recalibration: Quest 3’s guardian system works better when re-mapped monthly
- Frame rates matter more than resolution: Smooth 6K beats stuttering 8K every time
- Room temperature affects thermal throttling: Viewing in 18-22°C rooms extended sessions by 30+ minutes before performance degraded
Safety Essentials
- Never near stairs, balconies, or open windows – AR passthrough restricts peripheral vision despite showing your environment
- Alert household members – Post “VR in use” signs or establish knock signals
- Remove sharp/fragile objects from play area plus 50cm margin
- Take breaks every 45-60 minutes – Set timers to prevent eye strain and dehydration
⚡ Quick Tip: Keep water bottle outside guardian boundary. Remove headset to drink rather than fumbling in passthrough — accidental spills damage electronics quickly.
Step 4: Installing or Streaming AR Scenes
Streaming vs Downloading
Streaming: Plays directly from servers without consuming storage. Requires 30-50 Mbps stable connection. Suits users with strong Wi-Fi and limited headset storage.
Downloading: Saves scenes to headset (4-8GB standard, 12-15GB for 8K). Quest 3 128GB holds 10-15 scenes; 512GB accommodates 50-70 scenes. Plays without buffering regardless of internet status.
Browser-Based Streaming (Standard Method)
- Ensure headset has 80%+ charge (AR drains batteries faster than VR)
- Connect to strong Wi-Fi (5GHz band preferred)
- Open Quest Browser, navigate to your subscribed platform
- Log in (most platforms remember credentials 30-90 days)
- Select content, adjust quality settings if needed
- Begin playback after 5-15 seconds buffering
⚡ Quick Tip: If streaming stutters despite strong Wi-Fi, close other browser tabs and restart Quest Browser. Background processes occasionally consume resources affecting AR playback.
Step 5: Calibration & Tracking Fixes
Initial Scene Setup
AR requires positioning performers in your space before playback. Use your controller to drag performers to desired locations (room center, on couch, on bed). Scale with pinch gestures until proportions look natural (standard height: 150-185cm). Rotate to face your primary viewing position. Most platforms save positioning per scene.
Common Issues and Quick Fixes
Performers drift out of position: Increase lighting to 350-450 lux. Add visual features to blank walls (posters, shelves) for tracking reference. Recalibrate guardian boundaries.
Jittery or vibrating content: Lower stream quality from 8K to 6K. Let headset cool for 5-10 minutes if warm. Ensure 30%+ battery remaining — performance degrades below this.
Wrong height (floating or sinking): Reset guardian with careful floor calibration. Place controller on actual floor during setup rather than approximating.
Lighting mismatch: Adjust room lighting to match performer’s pre-lit appearance. Moving lamps closer to virtual performer location often improves integration.
From my testing, most tracking issues resolved by improving lighting rather than adjusting software settings. Quest 3’s tracking worked flawlessly in 400-lux rooms but struggled in 200-lux environments, with performers drifting 5-10cm every few minutes.
⚡ Quick Tip: Save preferred positioning for frequently watched scenes. Most platforms remember placement per-scene, but manual saves ensure consistency after software updates.
Ready to Start Watching AR Porn?
Proper setup separates frustrating AR experiences from genuinely immersive ones. The 10-15 minutes invested in optimizing your space, lighting, and device configuration pays dividends through dramatically improved presence and spatial realism that traditional VR cannot replicate.
Your setup checklist:
- Hardware: Quest 3, Quest Pro, or Pico 4 confirmed (see device comparisons)
- Space: 2×3 meter area cleared, guardian boundaries established
- Lighting: 350-450 lux ambient lighting (artificial sources preferred)
- Safety: Fragile objects removed, water nearby, breaks scheduled
Once your setup is ready, explore our top AR porn sites to find platforms matching your preferences and budget. Start with trial subscriptions when available — RealVR ($1) and Real Girls Now ($1.95) offer risk-free evaluation before committing to monthly plans.
Remember: AR’s learning curve is steeper than traditional VR, but users who invest in proper setup consistently report AR as transformative rather than incremental improvement. The format delivers spatial presence and “shared space” intimacy impossible with purely virtual environments.
Frequently Asked Questions
Does AR porn need special apps or just a browser?
Most AR porn platforms work through Quest’s built-in browser using WebXR — no app installation required. Navigate to the platform’s website, log in, and stream directly. This avoids Meta’s restrictive Oculus Store approval for adult content.
Can I watch AR porn sitting down?
Yes, but AR’s core advantage — walking around performers and changing angles — requires standing and movement. Most users position performers at seated height, watch primarily seated, then occasionally stand to explore. Purely seated viewing somewhat defeats AR’s spatial advantages.
Why does my AR porn look grainy?
Passthrough cameras capture at lower resolution than headset displays. Quest 3 records at 18 pixels per degree. Low lighting (below 300 lux) dramatically worsens grain. Solution: increase ambient lighting to 350-450 lux and clean camera lenses. Graininess affects backgrounds more than rendered performers.
How much internet speed needed for AR porn streaming?
Minimum 30 Mbps for 6K, 40-50 Mbps recommended for 8K. Requirements exceed VR due to real-time processing overhead. Connection stability matters as much as raw speed — consistent 30 Mbps outperforms fluctuating 50 Mbps.
Do I need to reconfigure setup every session?
Not if you maintain consistent environment. Guardian boundaries save automatically. Most platforms remember performer positioning per-scene. However, rearranging furniture or viewing in different rooms requires reconfiguration. Dedicated viewing spaces eliminate repeated setup.